Thursday, February 14, 2008

Valentine's Heart Family


Today we used the great craft kit that Aunt Julie gave us to make these fun projects.

Items used:
construction paper
foil paper
google eyes
sequins
foam pieces
tissue ribbons
thin ribbon
glue and markers

I cut hearts out of the foil paper and we all let our creative juices flow.

Have fun. We spent 1 1/2 hours on this project

Thursday, January 31, 2008

Foam stamp art, kids thank you cards


We got this idea from parents magazine. We cut up a foam packing piece into a square. Had my daugther write thank you on a piece of paper. I held it up and traced the letters on to the back in reverse. I then placed the paper on the foam and traced over her letters. That left her writing in the foam. I used a pecil to make the inpression a little deeper into the foam. Then she sponged washable paint onto the foam piece and stamped it on the card stock. Cheap and easy, this projet only took a 1/2 hour and we had all of the supplies at home.

items used:
foam packing piece
card stock
scissors
sponge
washable paint

Monday, January 7, 2008

Tea Hats, Party Hats, Fun Tea Party hats


These are easy fun hats that you can make for a birthday party or just for a fun day of dress-up at home.

Items needed:
2 sheets of gift wrap or 2 pieces of newspaper
masking tape
hot glue
decorations (flowers, feathers, pom poms, etc.)

Place the paper on you childs head, wrap tape around just above the ears. You can style the hat by rolling the edges up, leave it loose for a floppy hat.

Use hot glue to attach the decorations.

Sunday, January 6, 2008

Tea Time Clock, invitation or craft


My daugther wanted to make a clock for her birthday party invitation this year. This is what we came up with.

items used:
*card stock two square pieces for each clock
*paper fastners
*puffy craft tape
*various pieces of crafting paper
*number stickers
*glue stick
*flower stickers

The hands on the clock are able to turn because we used the fastner to hold them on. We glued the second sheet of card stock on the back to hide the hardware. The flower sticker hides the fastner on the front of the card.

Friday, December 7, 2007

Snowman snack, kids edible craft


Today our craft was also our afternoon snack.
we used:
round wheat crackers
cream cheese
blueberries (eyes and buttons)
raisins (mouth)
baby carrots (nose)
red pepper (scarf)
olives (hat)
pretzels (arms)
These were quick and easy to make. 20 minutes and we had everything in our house already. I love that they became our snack. I almost missed getting a picture, the girls were desperate to eat them. My five year old even ate the red pepper.

Thursday, December 6, 2007

Get outside and build a real snowman, complete the look with a snowman kit


We have had contractors working on our house this past week. We weren't able to get many crafts done with the all of the mess.
We did manage to decorate store bought (refrigerated dough) gingerbread cookies. The girls had a great time decorating and eating their gingerbread men.
Over the weekend my husband went outside with the girls to enjoy our new layer of snow. They used one of our favorite Christmas gifts. A few years ago our neighbors gave us a snowman kit from Restoration Hardware. We love to use it and the girls have fun repairing snowman each day as he melts. The kit has a hat, eyes, carrot nose, mouth and buttons. If you need a inexpensive idea for neighbor kits this is a great idea. You could easily make your own by going to the thrift store for hats and scarves, get creative with the eyes nose and mouth materials. It will be fun to see your neighborhood decorated after the next snow storm.

Friday, November 30, 2007

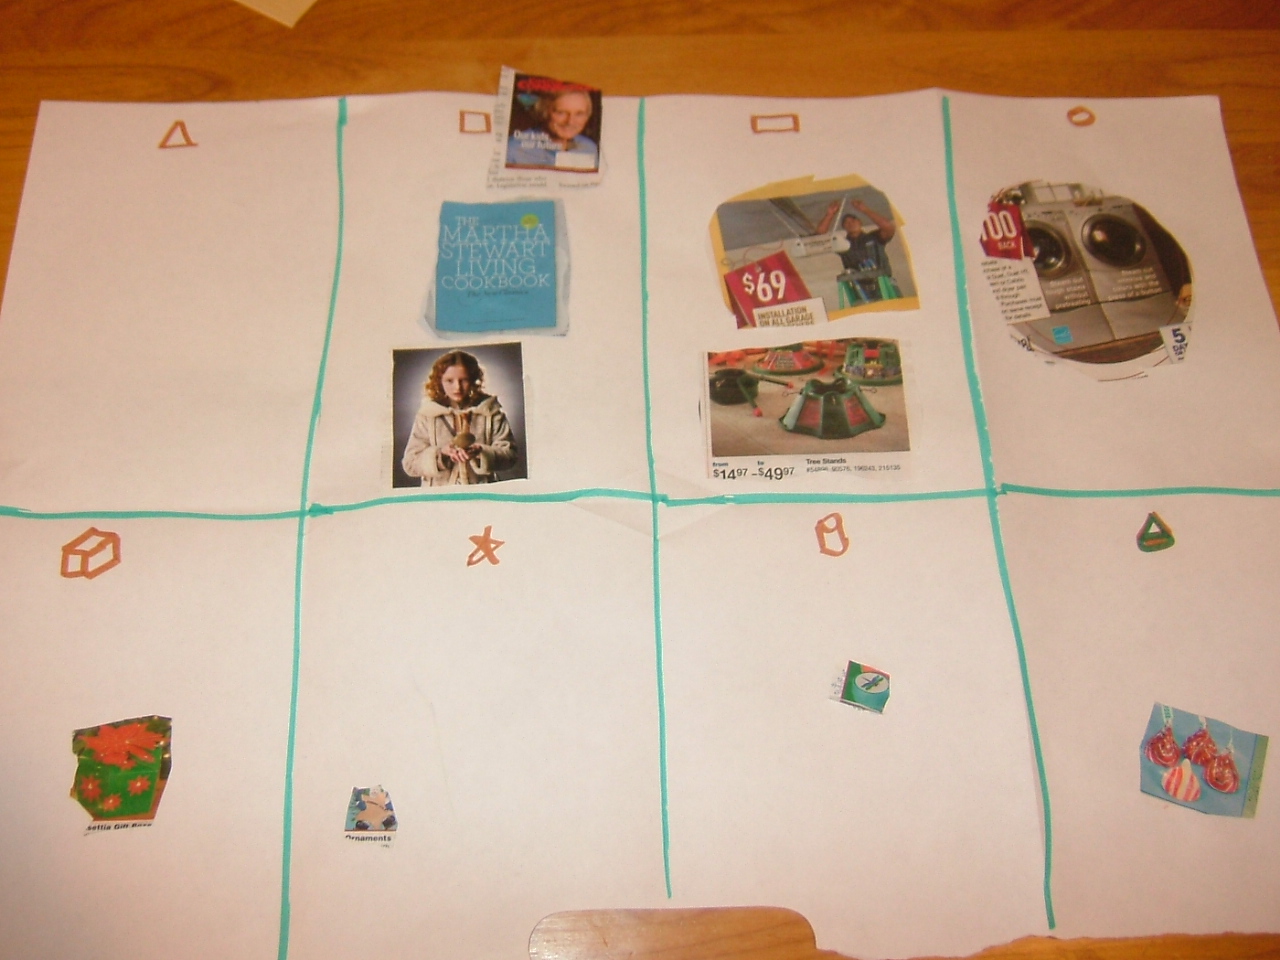
learning shapes collage, kids educational craft


Todays project was very easy but kept my 5 year old entertained for almost 2 hours.

I needed any easy project today, that didn't require much mom help (it was cleaning day). My 2 1/2 year old was sleeping so this was the perfect educational craft.

items needed:
Large piece of paper
glue stick
scissors
marker
old newspapers or magazines

Divide the paper into columns or a grid. Label each box with the a small drawn picture of a shape. I used triangle, square, rectangle, circle, cube, star, cylinder and cone.
Have your child search through the magazines or newspaper ads to find pictures that they think represent each shape. Then have them cut out the pictures and glue them in the appropriate box.
It is a simple project, but my daughter had alot of fun looking for the shapes and worked on her scissoring skills at the same time.

This project was 2 1/2/ hours start to finish (set-up and clean-up), was free and required only about a half hour of parent involvement. This would be a great group project.